Deep Cavity on Tooth #25 — Saving the Nerve with MTA Vital Pulp Therapy (VPT) and Resin Build-up
A case where the pulp was exposed during caries removal on an upper premolar (#25). MTA vital pulp therapy (VPT) and resin build-up were performed to preserve the natural tooth and avoid root canal treatment. By Dr. Kang Seokhoon at TTE Dental Clinic.
Patient Information
Deep caries, MTA vital pulp therapy (VPT)
Deep Cavity on Tooth #25 — Saving the Nerve with MTA Vital Pulp Therapy (VPT) and Resin Build-up
Hello, this is Dr. Kang Seokhoon from TTE Dental Clinic. Today we present a case involving a deep cavity on the upper second premolar (#25), where the pulp was unexpectedly exposed during caries removal. Through MTA vital pulp therapy (VPT) and resin build-up, we were able to preserve the natural tooth and avoid root canal treatment.
Many patients ask, "If the cavity is deep, does that automatically mean I need a root canal?" In modern dentistry, even when the pulp is exposed, there is a growing possibility of saving the nerve — thanks to MTA-based vital pulp therapy.
What Is MTA Vital Pulp Therapy (VPT)? The Scientific Basis for Pulp Preservation
Vital Pulp Therapy (VPT) is a treatment that preserves the nerve when the pulp is exposed during caries removal — rather than removing it entirely. The two primary techniques are direct pulp capping and partial pulpotomy.
Recent studies show highly encouraging success rates for VPT using MTA (Mineral Trioxide Aggregate):
| Treatment Method | Success Rate | Follow-up Period |
|---|---|---|
| Direct pulp capping with MTA | 81–93% | 12–24 months |
| Partial pulpotomy with MTA | 88–95% | 24–60 months |
| Conventional calcium hydroxide | 70–80% | 12–24 months |
Advantages of MTA:
- Excellent biocompatibility — integrates well with pulp tissue
- Superior sealing ability — blocks bacterial infiltration
- Creates an alkaline environment with antimicrobial effects
- Promotes hard tissue formation, inducing dentin bridge development
- Sets even in a moist environment
When Is MTA Vital Pulp Therapy Appropriate?
Not every pulp exposure is suitable for VPT. Success rates are highest when the following conditions are met:
- The exposure occurred mechanically during trauma or caries removal
- Bleeding at the exposed site is controllable
- The patient reports no spontaneous or nighttime pain
- Radiographs show no periapical pathology
- The tooth has an immature root (especially favorable in younger patients)
Today's Case — Deep Caries and Pulp Exposure on Tooth #25
Today's case involves the upper left second premolar (#25) with a deep cavity. The patient had a visible caries lesion, and during treatment, an unexpected pulp exposure occurred.
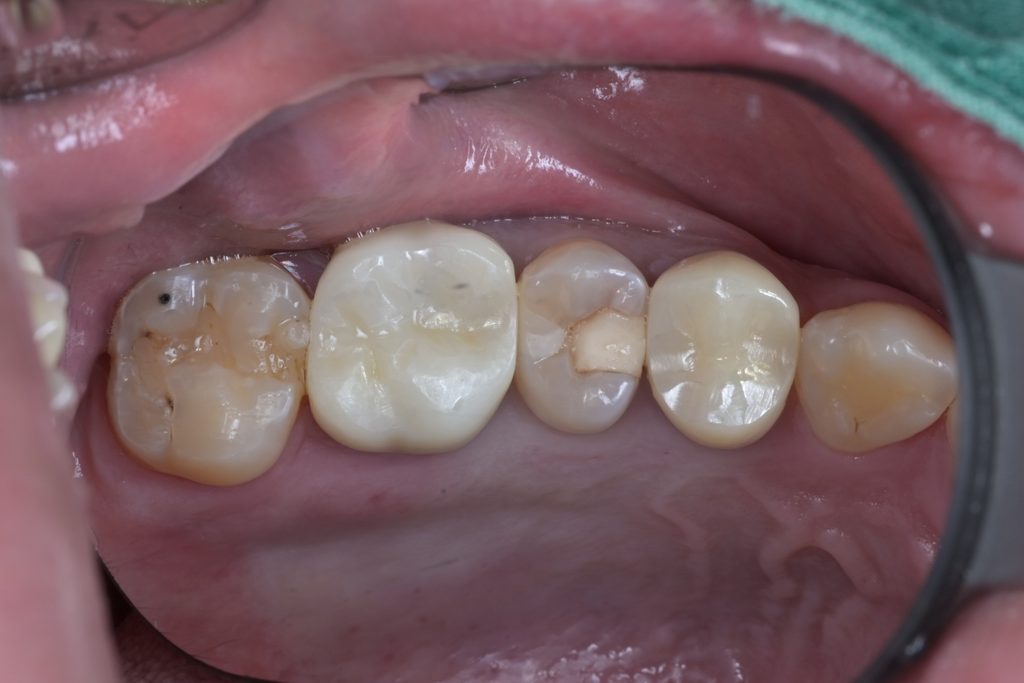

The patient presented without significant pain symptoms, and radiographs showed no periapical pathology. However, the caries was very close to the pulp, so we proceeded cautiously with the possibility of pulp exposure in mind.
Microscope Resin Build-up and MTA Vital Pulp Therapy Process
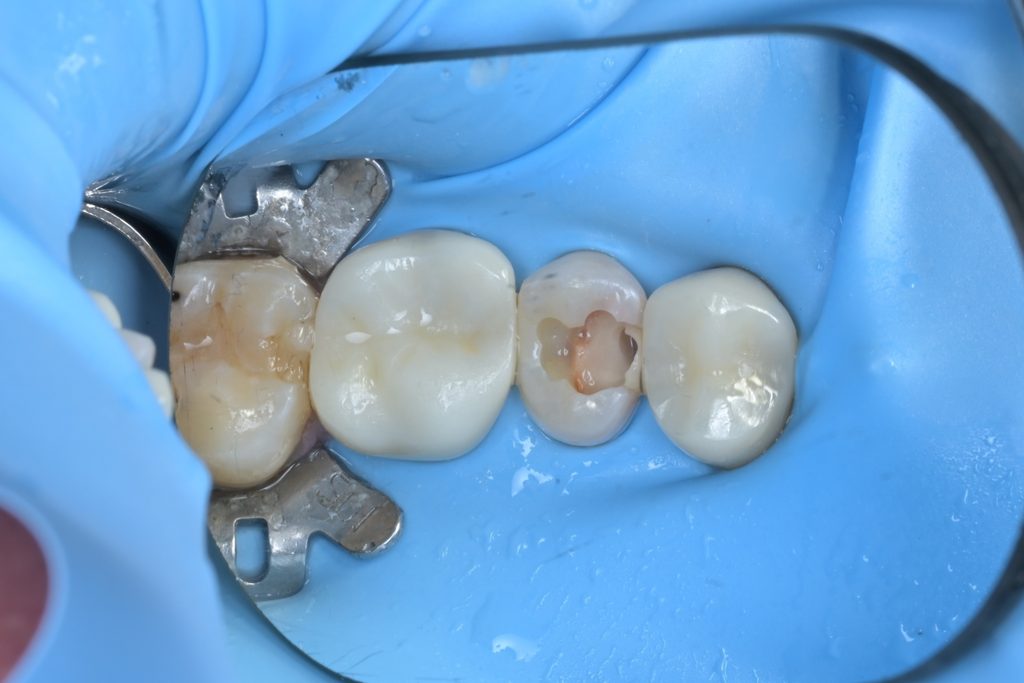
Step 1: Rubber Dam Isolation
The first step for successful pulp therapy is complete moisture control. If the pulp is contaminated by saliva, blood, or bacteria, the treatment success rate drops dramatically.

Step 2: Caries Removal
Using the dental microscope, the existing restoration and carious dentin are meticulously removed. Caries detector dye (Sable Seek) is applied to stain remaining infected tissue, which is then removed precisely until only healthy tooth structure remains.
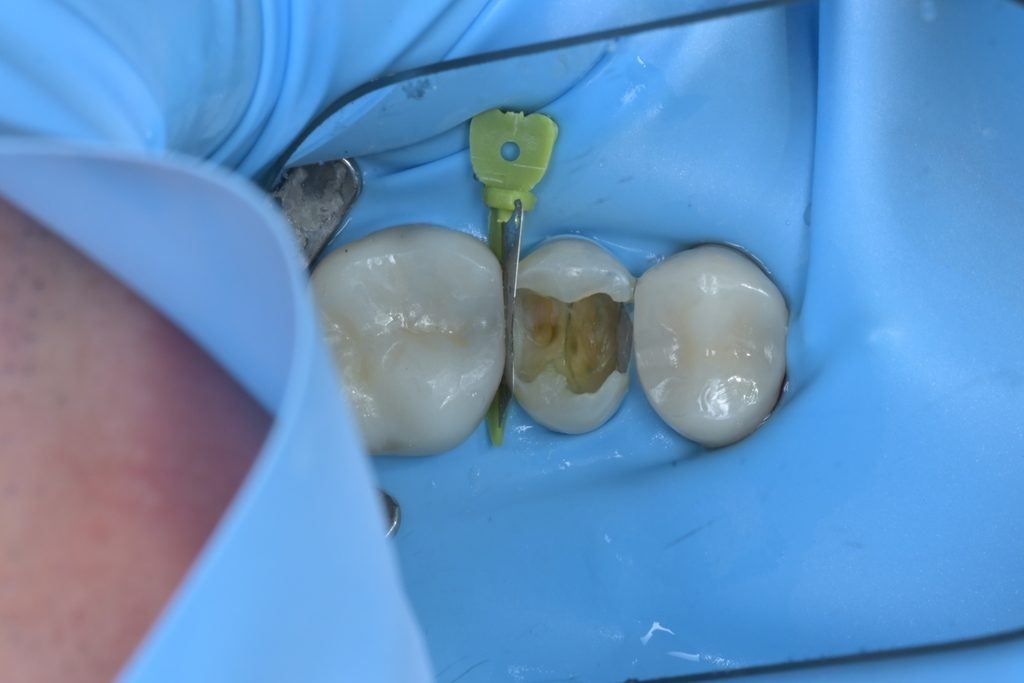
Step 3: Pulp Exposure Confirmation and Assessment
During complete caries removal, the pulp was exposed. At this point, assessing pulp vitality and health is critical.
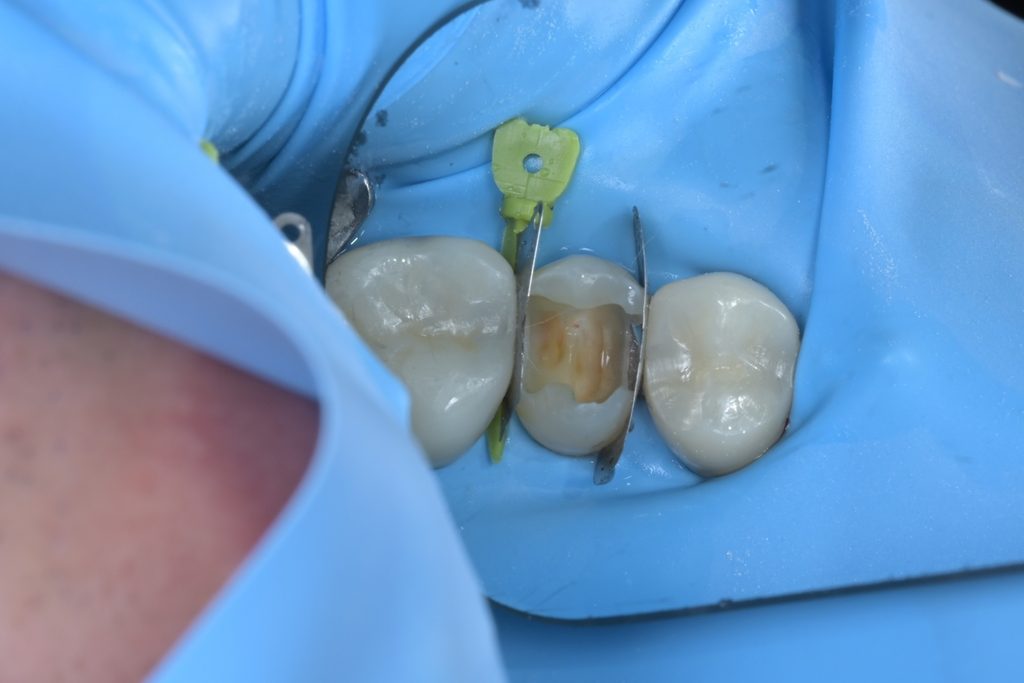
The bleeding was bright red and hemostasis was achievable. Combined with the absence of spontaneous pain, the decision was made to proceed with vital pulp therapy (VPT).
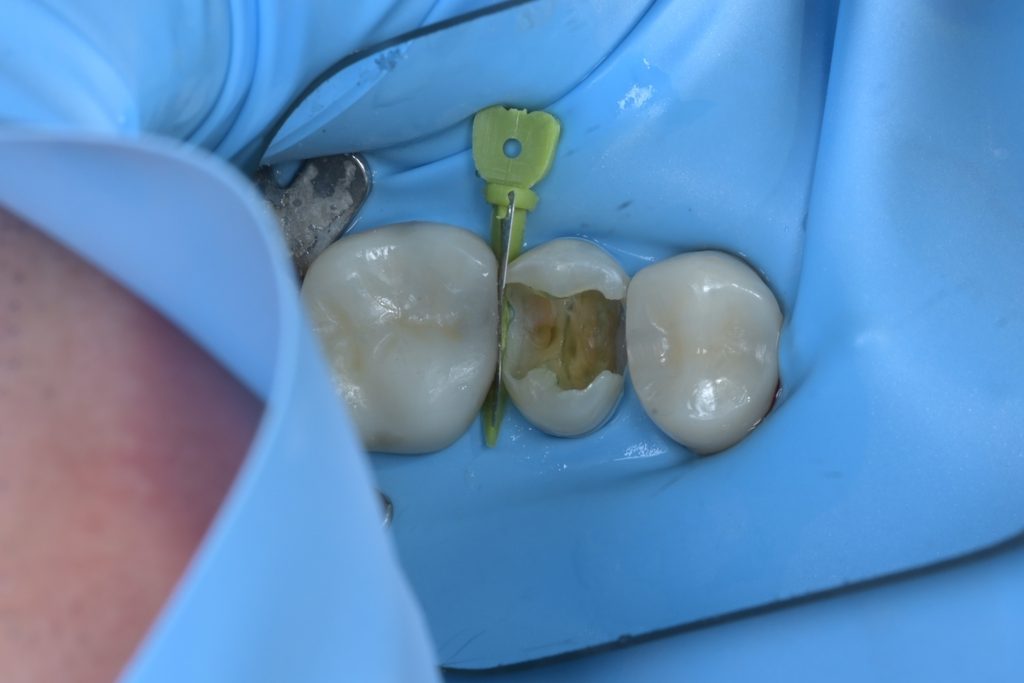
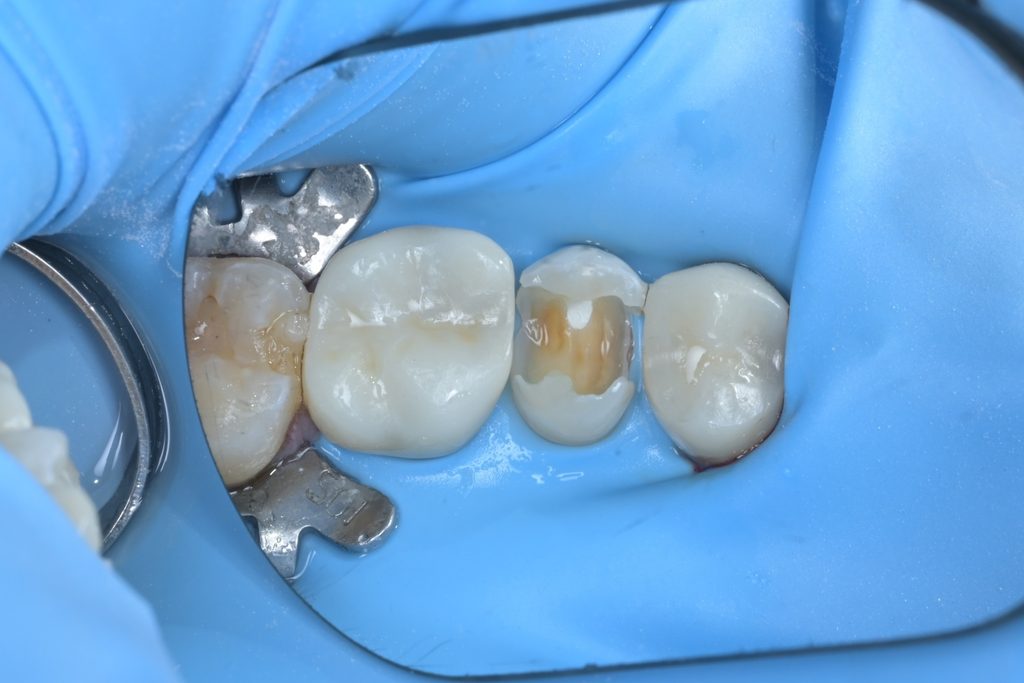
Step 4: Pulp Protection with MTA
The exposed pulp is irrigated with sterile saline, hemostasis is confirmed, and MTA (Mineral Trioxide Aggregate) is placed directly over the exposure site to create a seal. MTA sets even in a moist environment and has excellent biocompatibility with pulp tissue, promoting dentin bridge formation.

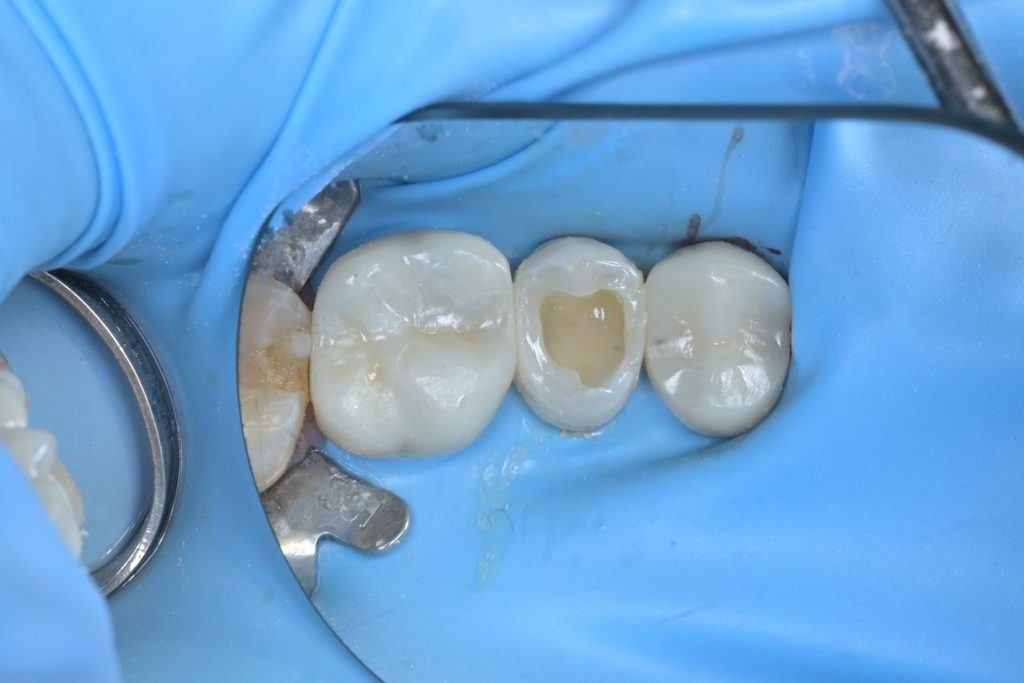
Step 5: Resin Build-up Restoration
Once the MTA has set, a resin build-up is performed over it using composite resin. The restoration is built layer by layer from the proximal surface to the occlusal surface, precisely recreating the original anatomical form.
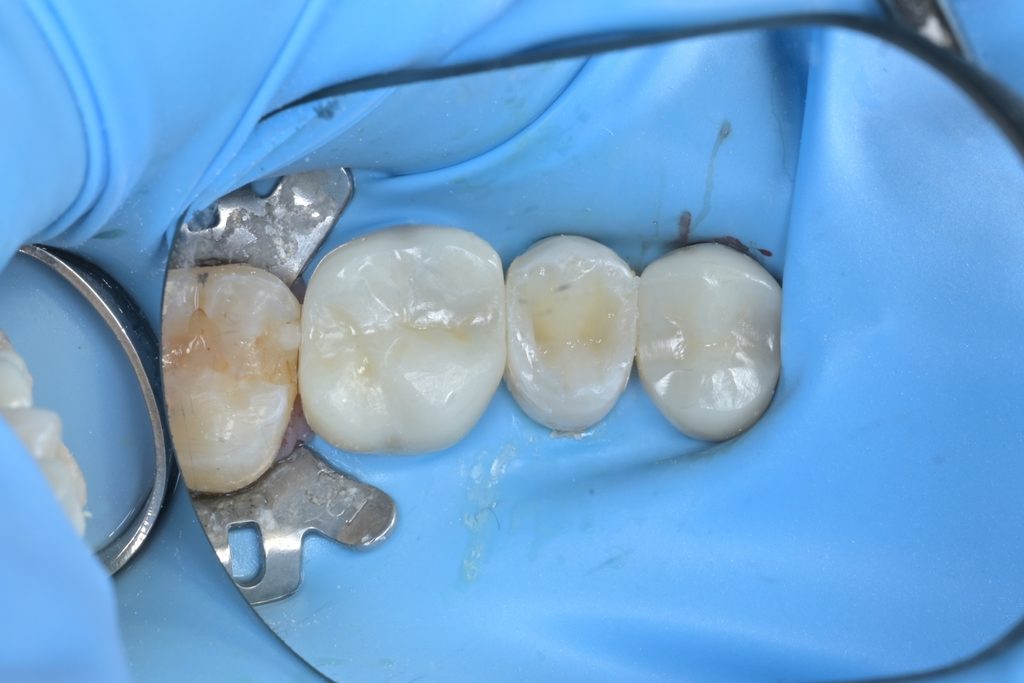
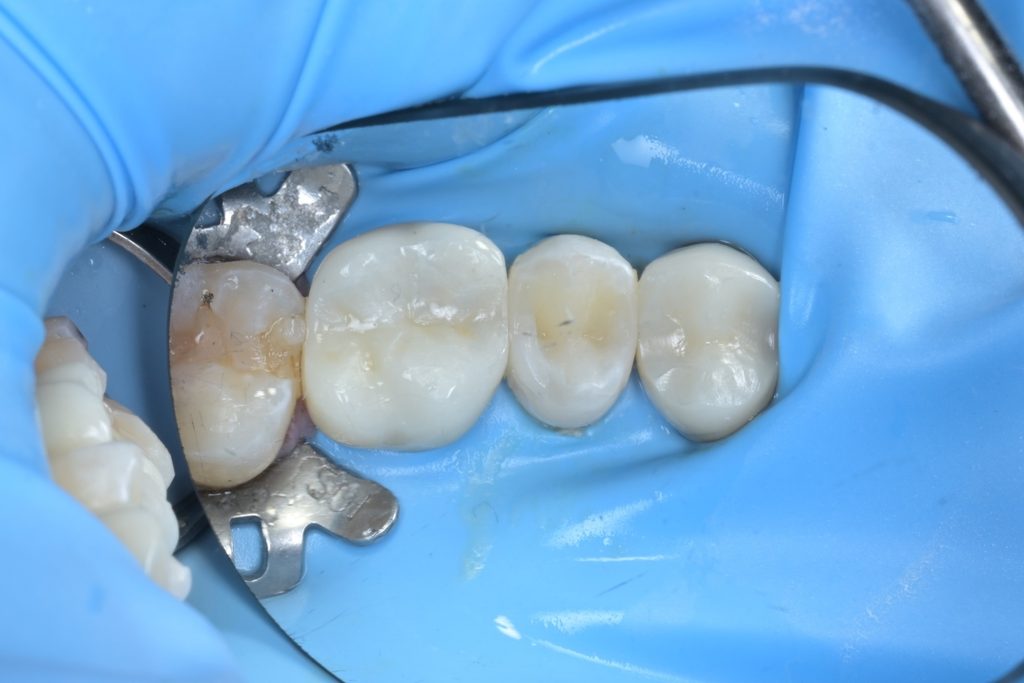

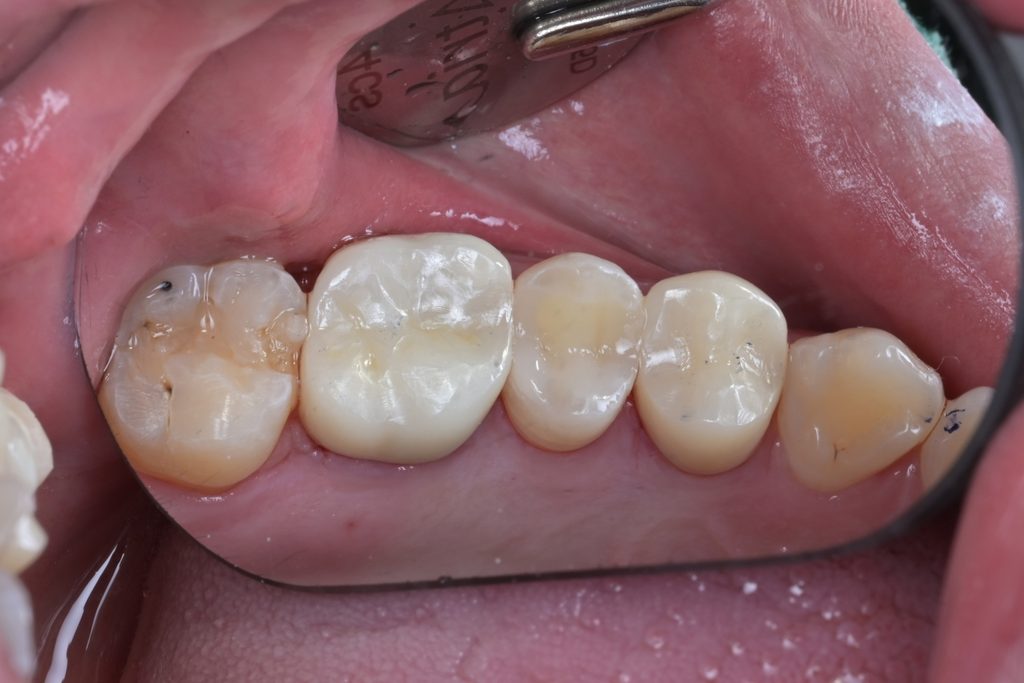
Final Finishing and Results
After completing the resin build-up, occlusal contacts were fine-tuned using articulating paper, and the surface was finished with diamond burs and a polishing system.
Disclaimer
All clinical photographs were taken with the patient's consent under standardized conditions. Treatment outcomes may vary by individual, and complications may occur.
임상 사진
(14장)관련 증례

Same Cavity, Different Outcomes — How Dental Microscopes Transform Every Treatment

Minimally Invasive Resin Build-up Is the Answer for Pediatric Cavities — Treating Extensive Secondary Caries in a 9-Year-Old
