[Root Caries] Why Is a Rubber Dam Essential When the Gum Line Is Decayed? (Feat. Saving Natural Teeth)
A case of root caries at the gum-tooth junction treated with precise resin build-up under rubber dam isolation. Clamp-assisted gingival retraction and proper bonding are the keys to success.
Patient Information
Discoloration at gum-tooth junction, sensitivity to cold water
Hello, this is Dr. Kang Seokhoon, Director of TTE Dental Clinic.
Have you ever noticed a dark area where your gum meets your tooth while brushing, or felt a sharp sting when drinking cold water? This is what we commonly call root caries (cervical caries) — decay at the tooth root near the gum line.
This area is notoriously difficult to treat, even among dentists. Seepage from the gums and saliva easily compromise adhesion. A hasty filling will quickly come loose, and decay will return through the gaps.
But when we follow proper protocol, the tooth can be restored so seamlessly it looks completely natural. Today, I will show you the actual rubber dam resin build-up process from our clinic — exactly as it was performed.
[Part 1: Treatment Process]
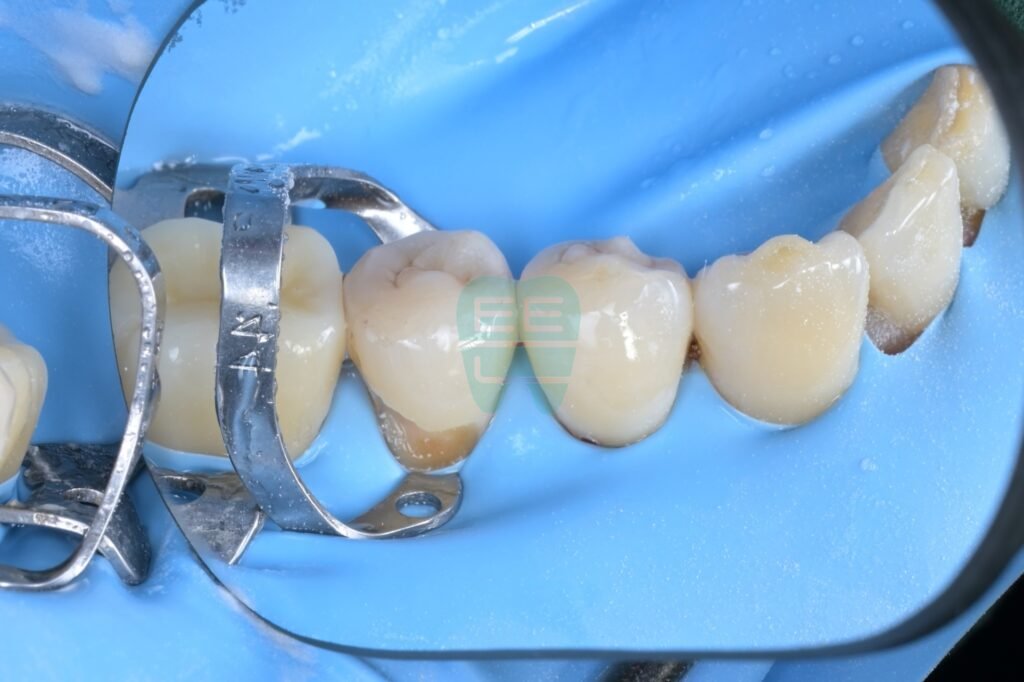
The patient presented with root caries on the premolar and canine area. For reliable treatment, a rubber dam was placed to create a completely moisture-free environment before starting.
STEP 1. Identifying the Problem Tooth (Second Premolar)
We begin with the premolar (tooth #5) at the back. The rubber dam isolates just the tooth, but deep beneath the gum line, hidden decay is visible.

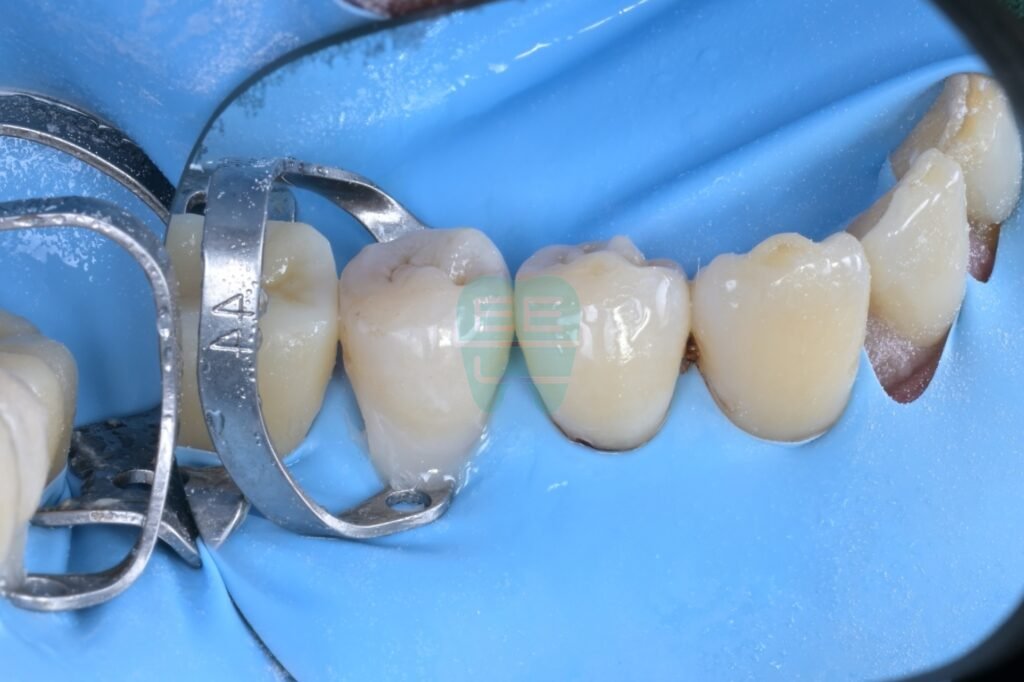
STEP 2. Caries Removal
The decayed tissue is carefully and precisely removed. The skill lies in eliminating only the contaminated area without injuring the surrounding gum tissue. Surface preparation with AquaCare is also completed at this stage.
STEP 3. Resin Build-up (Second Premolar Complete)
The cavity is filled with high-strength composite resin. This is not simply plugging a hole — it employs a build-up technique that faithfully recreates the original contours of the tooth.
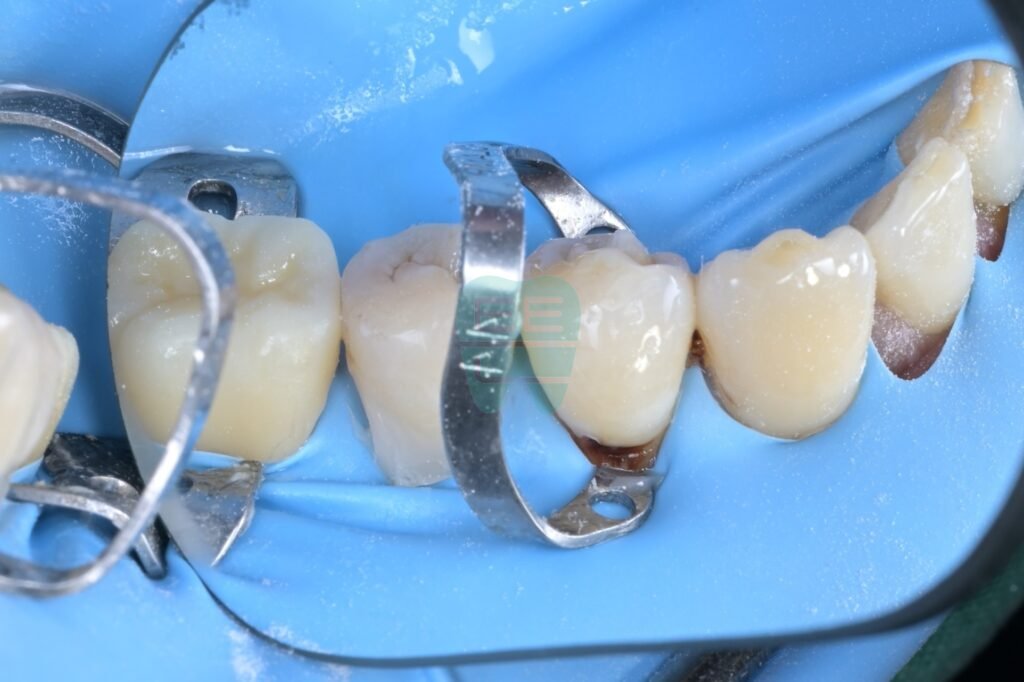
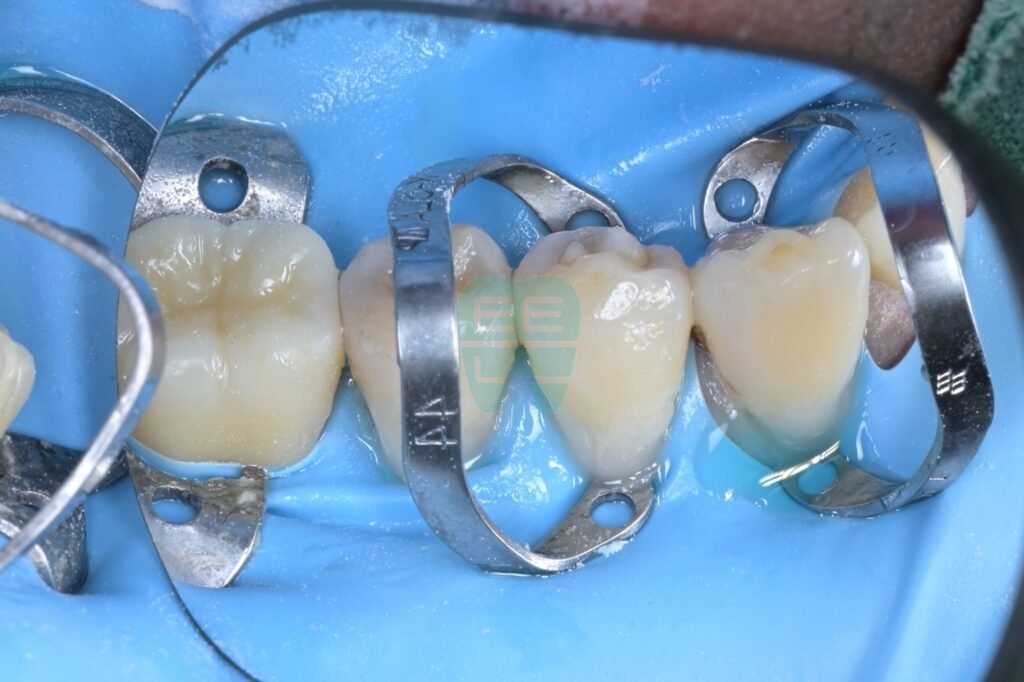
STEP 4–5. Isolating the Anterior Teeth (Clamp Placement)
Now it is time to treat the first premolar (tooth #4) and canine (tooth #3). Because the gum line is deeper in this area, a specialized clamp (metal retractor) is placed on each tooth to gently retract the gum tissue.
"Doctor, is all this really necessary?"
Yes, it is. The metal clamp gently pushes the gum away so the treatment area is fully visible, and the adhesive does not contact the gum — significantly improving treatment success rates.
STEP 6. Precision Resin Build-up
With a clear field of vision secured, the canine and premolar are meticulously built up with composite resin. Even the finest gaps between teeth are addressed, restoring the original anatomy.
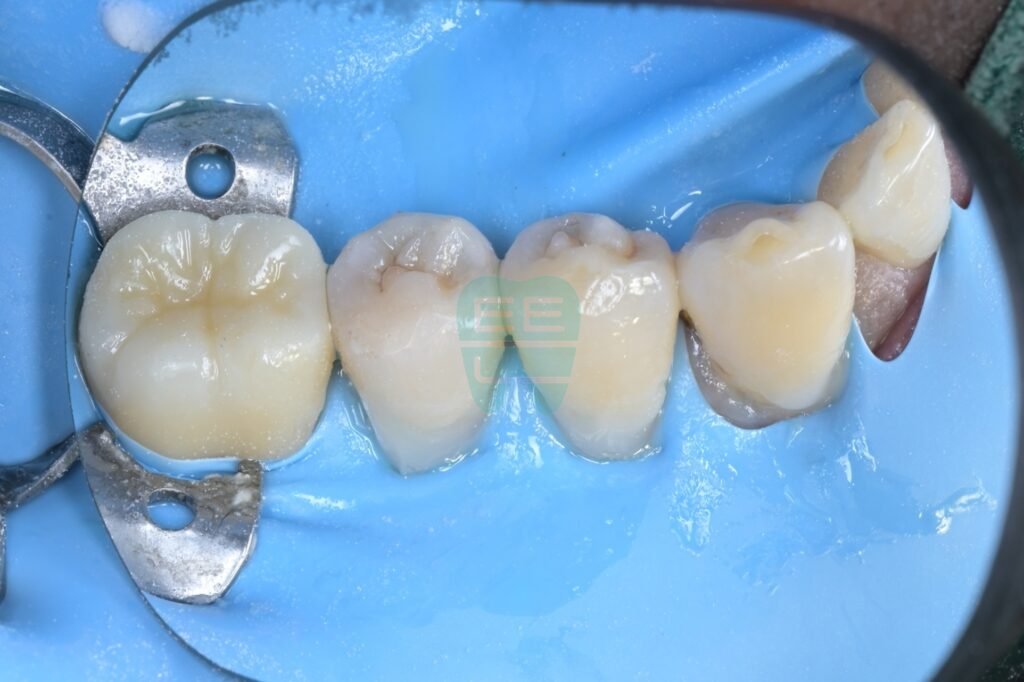
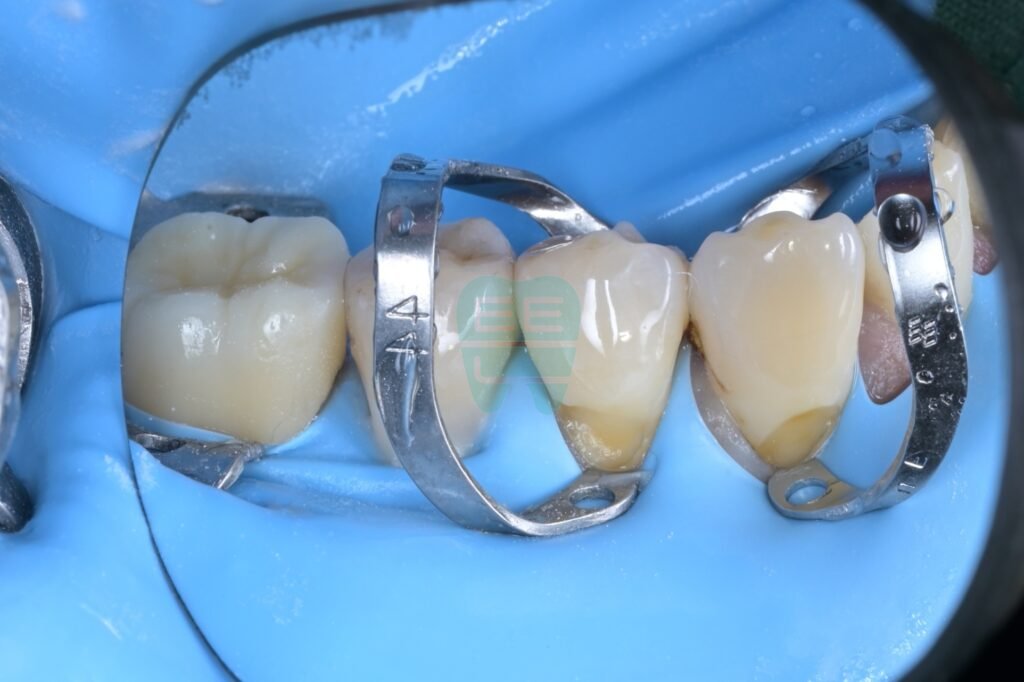
[Results: Before and After]
Here is the result immediately after removing the rubber dam and clamps.
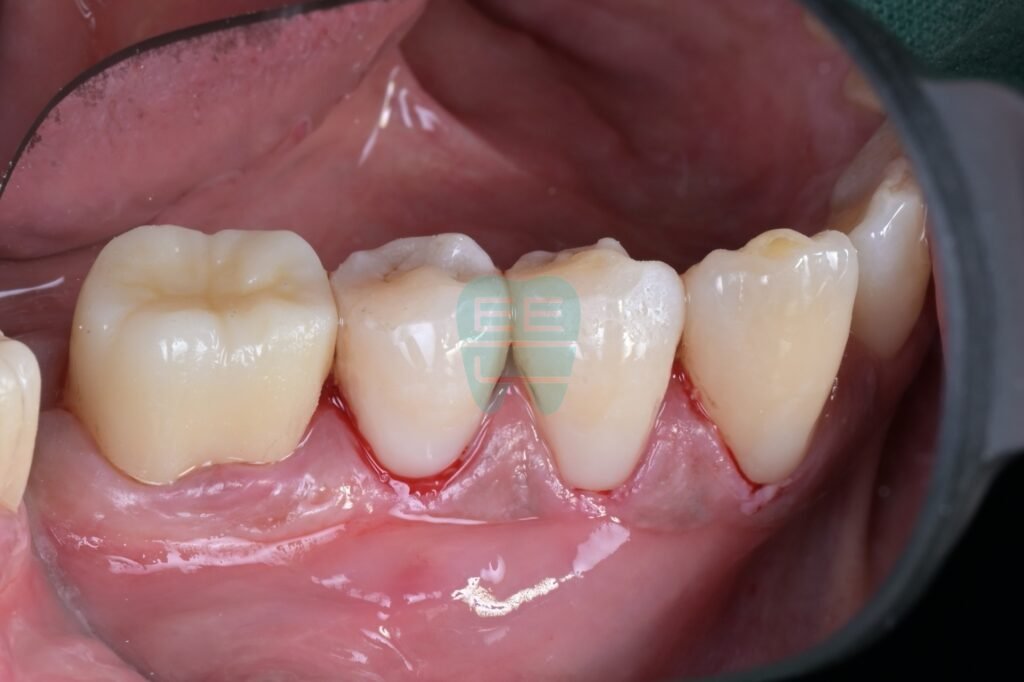
Notice how naturally the restorations follow the gum line. The slight gum compression will resolve within a day or two. What matters most is that there is absolutely no gap between the tooth and the resin.
[Conclusion: The Philosophy of TTE Dental Clinic]
Root caries is often dismissed with "let's just monitor it" or immediately escalated to "let's place a crown" — because it is tedious and difficult to treat.
However, by investing a little more time and going through the meticulous process of rubber dam isolation, we can preserve the tooth without grinding it down — achieving true natural tooth conservation.
"How would I treat this if it were my family member's tooth?" Guided by this question, we continue to uphold the fundamentals in every treatment at TTE Dental Clinic.
Disclaimer
All clinical photographs were taken with the patient's consent under standardized conditions. Treatment outcomes may vary by individual, and complications may occur.
임상 사진
(8장)관련 증례

Same Cavity, Different Outcomes — How Dental Microscopes Transform Every Treatment

Minimally Invasive Resin Build-up Is the Answer for Pediatric Cavities — Treating Extensive Secondary Caries in a 9-Year-Old
